Painting Over Dark Colours Effectively
How to Cover Bold Reds, Blues, and Greys Without a Fight
That bold feature wall was a great idea a few years ago, but now you’re ready for a change. The only problem? The thought of covering that deep charcoal grey or vibrant red with a light, airy colour seems like an impossible task. It’s a common DIY nightmare – you apply coat after coat of your new colour, only to have the old, dark shade stubbornly grinning through. The secret isn't to just keep adding more expensive topcoats; it's to use the right product and the right technique to reset your wall to a neutral canvas.
The Biggest Mistake: Just Using More Paint
The most common mistake is thinking that three or four coats of a high-quality "paint and primer in one" will be enough. While these products are great for similar colour changes, they aren't designed to block a truly dark and saturated colour. You'll waste a huge amount of time and expensive paint, and you’ll likely still be left with an uneven, patchy finish where the old colour's undertones are still visible.
The Real Secret: A High-Opacity, Tinted Primer
The one and only way to do this job efficiently is to use a dedicated primer or undercoat. But not just any primer will do.
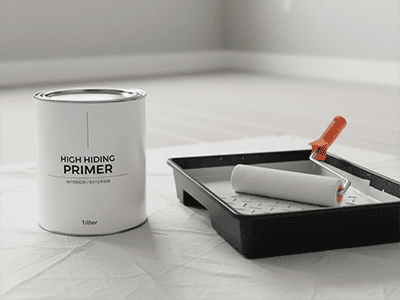
- Choose a High-Opacity Primer/Sealer: You need a product specifically designed for its hiding power. Look for terms like "high hiding," "stain blocker," or "maximum coverage" on the can. These are formulated with a higher concentration of solids to block out what's underneath.
- The Pro Trick - Get it Tinted Grey: Here is the game-changing secret. Instead of using a standard white primer, ask the paint shop to tint it to a light or mid-tone grey. A neutral grey base does a far better job of hiding a dark, saturated colour than stark white does. It neutralises the strong undertones (especially reds and blues) and gives your new light colour a much more solid and even starting point. One coat of grey primer is often more effective than two coats of white.
The Step-by-Step Process for a Perfect Cover-Up
With the right product in hand, the process is straightforward. Don't cut corners here.
- Prep as Usual: Clean the dark wall thoroughly with Sugar Soap to remove any grime. Fill any holes or cracks, sand the repairs smooth, and then give the entire wall a light scuff sand to help the primer grip. Wipe away all the dust.
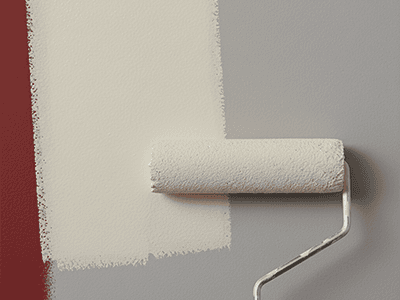
- Apply Your Tinted Primer: Cut in around the edges with a brush, then roll the entire wall with your grey-tinted primer. Focus on getting a solid, even coat. Don't worry if it looks a bit streaky; its job is to block the colour, not to be a perfect finish. Let it dry completely as per the can's instructions.
- Assess and Recoat if Needed: Step back and look at the primed wall. If the old dark colour is still strongly visible, a second coat of primer is a smart move. It's much cheaper and faster than applying an extra topcoat.
- Apply Your New Topcoats: Once your grey primer base is solid and dry, you can proceed with painting your new, lighter colour. You'll be amazed at how well it covers. You should now be able to achieve a perfect, rich finish in just two standard topcoats.
Pro Tip from a Sydney Painter
Using a grey-tinted primer is a non-negotiable technique for us when tackling dramatic colour changes. It’s the most efficient and cost-effective method to guarantee a flawless result. We know exactly which primer bases and grey tints work best to neutralise even the most stubborn colours. It's this kind of trade knowledge that saves time and money on a project. If you have a challenging colour you need covered, the team at DRJ Painting has the experience to make it disappear without a trace.